Category Archives: Recipes

Tasty Tuesday: Sweet Potato Shepherds Pie

Sweet potatoes are flippin’ awesome. They are fantastic for digestion, heart health, skin health, and blood sugar levels. Specifically, they are high in Vitamin B6, Vitamin A, Fiber, Potassium, Vitamins C and E, and Manganese.

This recipe was my attempt at making my mom’s amazing shepherds pie but without the starch of potatoes. With that in mind, it was GROSS. But once we stopped thinking of it as Shepherds Pie and started thinking of it as a dish on it’s own, SO DELICIOUS. Isn’t it weird how your brain can trick you like that?

This was incredible easy to make and I just kept it in a crockpot in the fridge and reheated it (on the lowest temperature possible) for 3 nights straight. Thank you bulk-cooking!

SweetPotatoPotPie-Published

Sweet Potato Pot Pie (6-8 servings)

Ingredients:

  • 7 organic sweet potatoes, chopped into small chunks
  • 3/4 cup organic milk (almond, coconut, dairy, whatever)
  • 1 organic yellow onion, diced
  • 4 cloves garlic, minced
  • 2 pounds organic ground turkey
  • 1 package of organic gravy mix
  • 8oz organic frozen mixed veggies (carrots, peas, etc)

Instructions:

  1. Boil sweet potato chunks in a large pot until soft. While they are cooking, mix gravy. 
  2. Drain water from pot add the milk and mash it all together. Set aside.
  3. In a separate, deep pan, sauté onions and garlic for 5 minutes on medium-high heat.
  4. Add turkey to pan and cook until brown.
  5. Add gravy and frozen veggies to pan and mix together.
  6. Either in the large pot or in a crockpot, layer the meat mixture, then the mashed sweet potatoes. Heat in the crockpot or oven on low for 10 minutes. This allows the juices to mix together. YUM
  7. Enjoy!

Tasty Tuesday: Roasted Chickpeas

I’ve been keeping a pretty tight watch on Pinterest lately. Yesterday I spent an hour friending people and looking through their pins. It was AMAZING. So many cheap DIY ideas and pretty house stuff. I can only imagine what it will be like when I actually have something to plan for like a new house or a wedding or a baby or something. One question I have, with all the time people spend on Pinterest, do they ever actually do any of the things they pin??

Here the link to my Pinterest if you’re interested in following me.

On that note, Pinterest has become my online recipe book and I finally made something from it on Sunday: Roasted Chickpeas. I found the recipe on one of my favorite blogs: SammieKennedy.com. Here is the link for her post of the recipe.

So I had a couple of cans of chickpeas with every intention of making them into hummus, then I thought, why not fry them instead? These were so tasty warm out of the oven but even better when I toasted them again the next day. So savory with just a little crunch. And actually pretty good for you. And for the financial restricted, they’re cheap too!

RoastedChickpeas-Published


Ingredients

  • 2 12oz cans of organic chickpeas (garbanzo beans)
  • 1/4 cup olive oil (ok because this will be medium heat only)
  • 1 tsp cayenne pepper
  • 1 Tbsp cumin
  • 1 tsp paprika
  • 1 tsp sea salt

Instructions

  1. Preheat the oven to 450°F. 
  2. Drain and rinse the chickpeas with water. Dry them on a paper towel.
  3. Add chickpeas and all spices to a bowl and stir until chickpeas are covered.
  4. Pour oil in pan then heat it in the oven for a few minutes. Take it out and shake the pan to distribute the oil.
  5. Spread the chickpeas in the pan in a single layer.
  6. Cook for 10 minutes shaking the pan every 3 minutes to ensure the peas don’t burn.
  7. Enjoy!

Tip: These will dry out over night. Stick them in the toaster for a couple of minutes for an even tastier, crispier snack.

Thanks for the recipe Sammie Kennedy! Everyone, please check out her site for more awesome recipes and health info.

And let me know what you think after making these 🙂


Tasty Tuesday: Chicken Tikka Masala

Professional cyclists DO NOT eat a healthy diet. Especially not the riders over in Europe. Mike and I saw this first hand when, while following the Giro d’Italia, we picked up their discarded feed bags on the side of the road. All we found were pastries and “energy bars” full of refined sugar and bad carbohydrates. It was unbelievable to us that their team directors think it acceptable and, above all, profitable to fuel their riders with these kinds of food. How much better would they perform on a 5 hour race day if their bodies could actually use the food they were given?

FeedZoneCookbook

This weekend I met two of my favorite chef’s: Dr. Allen Lim and Chef Biju Thomas. They co-authored “The Feed Zone Cookbook.” Allen Lim was the director of sport sciences for professional cycling teams, Radioshack and Garmin. He introduced the idea of gluten-sensitivity and the importance of a healthy diet in a training plan. Biju Thomas is an avid cyclist and chef to some of the top riders in the US. The cookbook is based on very simple but very healthy meals that could be cooked with 3-5 ingredients on one stove-top while on the road. I love it.

One of my favorites (and now perfectly adapted for me) recipes is their Chicken Tikka Masala. Their version uses lots of yogurt which is fine if it’s raw (or at least organic) but I wanted to see if I could get rid of it altogether. So I replaced it with canned coconut milk and OH-EM-GEE. Really, really yummy.

I was always nervous about cooking curry because it’s so tasty that I figured it would be complicated. Absolutely not the case. This is one of the easiest dishes I’ve ever cooked and it now holds a preferred spot on our meal planning menu.

Curry-Published


Ingredients (3 servings, double this to make 6 servings and last a couple days)

  • 4 cups of cooked quinoa for the base
  • 2 lbs chicken, cut into bite sized pieces (I used my leftover chicken from my roast last week)
  • 1-cup tomato sauce
  • 1 12oz can organic coconut milk (shake before opening)
  • 2 Tbsp curry powder
  • 1/2 a sliced onion
  • 1 tsp salt
  • a dash of cayenne pepper or 2-4 green chiles, cut into strips (optional)

Instructions

  1. Combine all ingredients in a bowl and, if you can, let marinate in the fridge for at least an hour. I didn’t have time for this and it was still delicious.
  2. Pour all ingredients into a deep pan and simmer, uncovered, over medium heat for 30 minutes.
  3. Spoon on top of your quinoa and enjoy!

It’s the simplest and most delicious meal. Definitely one of our favorites. Try to pair it with a spinach salad to get your raw veggies in.

Let me know how it goes! I hope you’re all having very fun and spicy days 🙂


Tasty Tuesday: Sushi Night!

With the holidays and all the other things I have to say, I haven’t posted a recipe in a few weeks. I’m going to bring back the routine with a very easy and very fun recipe you can do with two people or 7 people. Make Your Own Sushi! For Christmas, my siblings and I decided to give my parents something they don’t get very often: all of us together. So we wracked our brains to think of how we could do a cheap, healthy meal and instead of going to a crappy restaurant, we cooked for ourselves!

There is a little hardware involved in this one ($2 bamboo mats you get at the grocery store) but people can share so you don’t need many. The prep is SUPER easy and the dinner making part is really fun. Just try it why don’t you!

photo 3 copy photo 4 copy^ Prep everything in slivers.photo 1 copy< Lay it all out.photo 5 photo 1photo 2^ Roll your sushi!photo 3photo 4^ My brother had the great idea of taking a roll to work the next day 🙂photo 2 copy^ Isn’t my family beautiful. Gosh I miss them so much, this photo makes me want to cry. Blehhhhh.

Supplies:

  • plastic wrap
  • bamboo mats, 1 per 2 people – $2 at your grocery store

Ingredients (can really be anything you want but this is what we used):

  • short grain rice (brown if you can find it)
  • rice vinegar (or red wine vinegar if you don’t have it)
  • Nori seaweed paper
  • carrots
  • avocado
  • cucumber
  • crab (sushi grade)
  • salmon (sushi grade)
  • mango

Instructions:

1. Prep the rice – sushi rice is prepared in a very particular way.

  • Pour the rice into a bowl and cover with clean water. Slosh the rice around with your hand for 15 seconds then drain it. Repeat several times until the water coming out is pretty much clear.
  • Add rice and more clean water to a pot at slightly more than a 1:1 ratio.
  • Cooking on high heat, stirring every couple of minutes, until the water boils. Lower heat and cover for 6-8 minutes, stop when the water is absorbed. No need to stir.
  • Remove the rice with a wooden spoon so as not to damage it. Also, don’t scrape it off the bottom of the pot, just use what comes out easily.
  • For every 3 cups of rice, add 1/2 cup rice vinegar. Stir it together and you’re done!

2. Cut the fillings into long, thin slivers.

3. Lay it all out on the table and let everyone go to work!

  • Our photos are clearly the work of amateurs. Just check out this link for the best instructions I found on the internet. Sushi rolling takes some serious technique so it’s really funny trying to do it. But everything tastes delicious no matter what it looks like and, eventually, you get the hang of it…on the last roll. Haha.

And that’s all! And when I say “that’s all,” I mean this meal is an adventure. It’s so much more fun than going out to eat though, and so much cheaper!

Has anyone else ever done this? How did it go? Much love everyone. I hope you all have happy Tuesdays 🙂

My Diet: The Mystery Revealed

I got a message from a friend last night. She has been gluten-free for a while now but is still having gastrointestinal problems. Most of my friends know how crazy sensitive my stomach is and how much I have to do (and not do) to tame it. So voila! A page just for that. Check out the panel just above this post for “My Diet.” Or click on this link.

Feel free to ask any questions or let me know if you think something I said was wrong.

I hope you’re all having wonderful days! It’s important to keep that smile on right now, after the Holidays. Maybe if you fake it for a while, you will convince others AND yourself that it’s real 🙂

Throw-It-In-Your-Bag Thursday: Homemade Trail Mix

I’ve been getting a little fired up in my posts the last couple days. Warning, that trend is about to continue … I’ve been getting it from patients and friends: I just don’t have time to eat healthy! I have so many presents to buy and still have to work my job! OH-EM-GEE guys. This is not an excuse, it just means that you have to be better planners for the few weeks that your schedule is tight. If you can learn to do it now, imagine how many busy times it will help you through.

Here’s what most people do when they don’t have time to pack a lunch: eat fast food or don’t eat at all (less likely but the healthier people think this is a better option). NEITHER of these is ok. You MUST eat multiple times a day to give your body the nutrients it needs to function properly, you’re not going to get those nutrients from fast food. End of story.

Now that we have that established, how the heck do you bring enough food to last you an entire busy day??

Well, you can make a smoothie (recipe for an awesome one is on its way), make a healthy sandwich, bring a couple pieces of fruit and….drumroll please…make your own trail mix! YAY!

photo 5

The trail mix has to be homemade because packaged and pre-made mix usually has quite a bit of sugar in it. Sugar coated dried fruit, nuts roasted and nutrients killed, or just plain chocolate chunks that pretty much cancel the goodness of the other stuff. I’m lucky enough that my grocery has an awesome bulk section (see above) but you can buy packaged raw nuts and seed too. No excuses.

A Few Rules:

  • no roasted nuts
  • no sweetened dried fruit
  • no chocolate unless it’s unsweetened
  • NO SUGAR

Trail Mix Possible Nuts:

  • almonds, raw
  • cashews, raw
  • walnuts, raw
  • pecans, raw
  • pistachio nuts, raw
  • brazil nuts, raw
  • macadamia nuts, raw
  • Any other nuts you like but NO PEANUTS! The processing of those hasn’t been so great lately.
  • sunflower seeds

Trail Mix Possible Sweetness:

  • raisins, unsweetened
  • dried cranberries, unsweetened
  • dried apricots, unsweetened
  • dried mango, tough to find unsweetened but so tasty when you do
  • chocolate morsels, unsweetened (aka. bittersweet chocolate chips)

Instructions:

  1. Buy a few bags of whatever ingredients you like and keep them handy.
  2. Throw a couple handfuls of each into a resealable plastic bag whenever you need and throw them in your backpack, briefcase, or car. Make enough to last you a few days.
  3. That’s it!!

TrailMix1-Published

I made this mix while writing this post. It took me a total of 2 minutes and 39 seconds. Just kidding, I didn’t time myself. But it was really quick!

Anyone else have mix-in ideas?

Tasty Tuesday: Meal Planning and Taco Night

A common excuse for why people don’t cook for themselves is that it takes too much time. To these people I say, “NO!” If you want to be healthy, you have to figure out how it works into your schedule. Of course, I can help you with this.

My Solution: Cook three times a week, the nights you have a bit more time. Easy meals that take no more than 30 minutes. Cook double and eat leftovers on nights you really don’t have time to cook. However, make sure that you are reheating the leftovers in the oven and on the stove top, microwaves are BAD. Let the 7th day be your meal vacation day and get a pre-cooked pizza or order in.

This strategy means I only grocery shop once a week and it’s only for the three meals I need to cook plus a little breakfast and lunchtime stuff. And now nothing goes bad either!

So this week one of the three meals was make-your-own tacos. YUM. It’s cheap and so incredibly delicious.

photo 1

photo 2

Make-Your-Own-Tacos

Side Ingredients (mix or match with whatever you have, and organic is best)

corn tortillas

refried beans

no sugar salsa

cucumbers, chopped

guacamole

pecorino cheese, grated (< hard sheep’s cheese, like parmesan but without the lactose)

Taco Meat Ingredients

ground turkey or chicken (< very important that it’s organic)

1 onion, diced

1 Tbsp coconut oil

garlic, 2 cloves minced or 2 tsp powder

1 Tbsp cumin

salt and pepper

optional: portobello mushrooms, other soft veggies

Instructions

1. Cook the taco meat. Sauté the onion and garlic in the coconut oil on medium heat for 5 minutes.

2. Add the ground turkey/chicken, spices, and veggies. Set to medium-low heat and cover. Stir occasionally while heating side ingredients. Cook for a total of about 15 minutes.

3. Heat refried beans in a pot on stove. Stir frequently.

4. Heat tortillas in oven on lowest setting for 5 minutes. While you’re plating the sides.

5. Put it out all nice and pretty and let people serve themselves! Enjoy.

Hope you’re all having wonderful Tuesdays 🙂


Thirsty Thursday: Spiked Peppermint Hot Cocoa

I don’t drink very much. In fact, I really dislike being drunk. So when I do drink, it’s because I love the taste and the calmness it can sometimes give me. Anyway! I get lots of questions from patients (whispered of course) along the lines of: please please please tell me I can still have a glass of [insert alcohol here]? Good news! While the company I work for may not condone it, I whole heartedly support a solid glass of something alcoholic every once in a while.

Wine is great, beer is great, and liquor is great BUT (you knew it was coming) there are a few rules to remember when drinking:

1. Alcohol is very high in calories and while I don’t think ANYONE should be counting their calories, they should be monitoring the amount of bad calories they take in. And yes, alcohol counts as bad calories. So if you’re trying to lose weight, limit the amount you consume.

2. Most mixed drinks are loaded with sugar. And I mean loaded. If you’re going to have hard alcohol, mix it with soda water, tonic, or just drink it straight. This keeps the calories and the sugar content down. My drink of choice is tequila on the rocks with lime. Delicious, effective, and relatively healthy.

3. Normal beer contains lots of gluten. Some people are unknowingly gluten-intolerant. If you’re getting outrageous hangovers, a bloated belly, stomach pains, or headaches while drinking it may be time to consider the gluten-free option of drinks. Redbridge is my favorite.

4. Non-organic wines have added sulfites and lot’s of people react to it without knowing they’re having a reaction. If you experience any of the symptoms from #3 while drinking wine. Try organic wine and see if they go away. Organic wine has no added sulfites. Any sulfites in organic wine are naturally produced through the fermentation process. If you find that you have less of a reaction with organic wine, try sulfite-free wine next and see if that feels even better.

Side Note: If you feel at risk for addiction, there are special rules that apply. You should limit or completely stop your intake of alcohol until you speak to a psychology professional.

With that said, I recently made one of my favorites. A delicious, holiday drink:

Spiked Peppermint Hot Cocoa (1 serving)

Ingredients

2 cups coconut/almond/raw milk

2 tablespoons unsweetened cocoa

1 oz (half a nip) of peppermint liquor

Instructions (not sure why the photos are so crappy, sorry!)

photo 1

photo 2

1. Heat the milk in a pot on medium heat. Stir in cocoa while heating.

photo 3

2. Remove from heat, stir in liquor.

Enjoy! 🙂

What’s your favorite holiday drink? Let me know and I’ll try to make a healthy version.

Tasty Tuesday: Guacamole!

Who doesn’t love guacamole? And all you people out there that are shaking their head, “no I hate guacamole, that delicious healthy fat combined with all those savory veggies and awesome spices, I hate it.” Obviously something’s wrong with you. The great thing about making your own dip is that you can take out any flavors you don’t like!

With this batch, I decided to try to add some protein. I put in some black beans and they are so tasty. Definitely be doing that again.

Guac is great to bring to parties with some crackers/chips or to put on top of salads. And it makes taco night SO much better. Plus, it’s so easy! This took me about 20 minutes to make and it will (hopefully with some restraint from Mike) last at least 3 or 4 days.

Easy Black Bean Guacamole

Ingredients

3 ripe avocados

1 small onion, diced

4 cloves garlic, pressed

6 oz salsa or 1 medium tomato, diced

juice from 1/2 lime, 1/2 lemon, OR 1 orange (I didn’t have anything else and it actually worked really well)

1 tsp cumin, to taste

2 tsp sea salt, to taste

1 tsp ground pepper, to taste

dash of chili powder

6 oz black beans

Instructions

photo 1

1. Our avocados were unripe yesterday so I took them out of the fridge and wrapped them in a brown paper bag. For some reason they ripen faster in paper bags. This morning they were perfect.

photo 2

2. Cut avocados in half, take out the pit, and scoop into a large bowl. Add all other ingredients besides black beans. Mash it all up with a fork or masher.

photo 3

3. Stir in beans or other add-ins. Taste test it! Mess with the spices however you see fit. It looks kinda gross but it is OH SO GOOD!

What is your favorite way to eat guacamole?

Hope you’re all having happy days 🙂

“Use This” Monday: Raw Milk

So this post may blow your mind a bit. Everyone knows the ads: “Got Milk?” According to the California Milk Processor Board, “milk has protein to build muscle and a unique mix of nutrient to help you refuel.” This is completely true, for FULL-FAT, UNPASTEURIZED, RAW dairy. Let’s get down and dirty with the facts here.

wolverine-got-milk

The Problem: milk in process

First the cows, whose natural diet is grass, are fed grains. They are packed very closely together and fed a diet that their bodies don’t know how to process. They contract diseases and pass them between each other like hor d’oeuvres at a cocktail party. To keep them from getting fatally sick, their farmers pump them full of antibiotics and hormones and then milk them.

The milk is then separated. This process removes the dirt and debris. For skim milk, it also separates the milk fat from the milk. For full fat milk, this part of the process divides and separates the fat globules. Not even the fat is full in full fat milk!

Then the milk is “fortified” with Vitamin A and D. I’ve always had a bad feeling about any of my food being fortified. Shouldn’t it already have all the nutrients it’s supposed to without us messing with it?

On to pasteurization. Whole and skim milk is heated to 161°F (72°C) for 15 seconds. This kills all the bacteria that may be leftover from our diseased cows. It also breaks down the lactase and makes the good parts of the milk unrecognizable by our bodies. There are almost NO NUTRIENTS in pasteurized milk.

The milk is then homogenized. This breaks down the fat particles (again) and distributes them more equally throughout the milk. This part of the process prevents the milk from separating and floating to the surface as cream after it is packaged. Why is the cream bad? Do we really need to break down the milk particles even more?

WTF mate!! That’s what you should all be saying right now. How did our milk become so molecularly altered? The biggest reasons for this extensive process is that people tend to get sick from diseased cows. We need to nuke the crap out of that milk to get rid of all those germs. Well here’s an idea, how about we just focus on having healthy cows! Organic, raw, unpasteurizing farmers avoid disease by feeding and keeping their cows the natural way: in fields, eating grass.

Unfortunately, it costs a small fortune to fund and distribute from farms like that, meaning raw milk can be pretty expensive.

A note on skim milk: most people have been trained to believe that fat is bad. Well some fat is bad: chemically processed and altered fat like canola oil, Crisco, and other oils heated until they’re rancid. But some fat is good: natural, unrefined fat like coconut oil, raw dairy, olive oil, organic eggs (even the yolk!), and many others. So please stop trying to just remove fat from your diet, instead just make sure that the fat you do eat is in its raw, unrefined, unheated form.

The Solution

1. Find a farmer in your area that you can trust. My bosses get theirs delivered to the office! They also buy their beef in bulk from the same farmer. This website gives a sweet list of raw farmers in every area of the US.

Lets-Do-Organic-Coconut-Flakes-043182005227

Thai-Kitchen-Organic-Coconut-Milk-737628079506

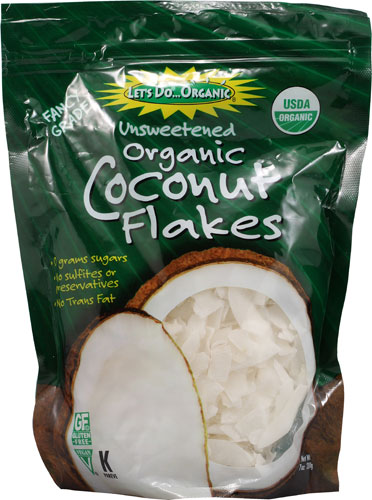
OR use other kinds of milk such as coconut, almond, oat, hemp, etc. Unless it’s specifically labeled, the only way to really ensure that even this milk is raw is to make your own. Coconut milk is pretty easy to make from coconut flakes and water (see this recipe). But for those of us without a Vitamix (I want one so badly!) you can make raw coconut milk from canned Thai Kitchen brand (see this recipe).

Organic-Whole-Milk-316x500

OR find a natural food store that sells raw, unpasteurized milk. There may be more than you think. Supernatural brand dairy products are organic, from grass-fed cows, un-homogenized, and heated to the lowest temperature allowed by the FDA. This is called VAT pasteurized and is definitely the lesser of the evils. Your health food store may carry a different brand. All you have to do is ask!

Why? Personal Motivation.

Conventional milk is so much cheaper and easier to find than raw milk. It tastes good too! Why would you spend all this time and money searching out the raw milk? Well I don’t know about you, but I eat food not only because it tastes good but because it give my body the nutrients I need to stay healthy. If I can drink a type of milk that helps me get my vitamins and minerals, why wouldn’t I take that trade? It is the same with all healthy eating.

Also, I thought I was lactose intolerant for about 2 years. Then I tried raw, full fat milk and I had no reaction! Pasteurization removes lactase, the natural enzyme that helps your body break down the lactose in dairy. Those who are lactose-intolerant can drink raw dairy!


There will always be a cheaper, less healthy alternative. You need to determine why you eat the way you do and figure out if raw milk is worth it for you. Honestly, while writing this post, and finding that not even the coconut milk I was drinking is  imperfect, I felt myself breaking down. Why do I do this?? Nothing I every buy will be perfect. I’ll have to make everything from scratch. NOOOOO. I don’t have the time.

So for me, I will be choosing the lesser of the evils. My unsweetened, organic coconut milk will do just fine for now. There is no lactose, no additives, and no underlying chemicals like in normal milk. This milk is much denser in essentials nutrients and fat than anything else I can afford. And as soon as I feel prepared and driven enough, I will start to make my own coconut milk.

Also, normal, organic milk just doesn’t really appeal to me. I haven’t had it in years and still don’t love the taste or the idea. I have this view that humans aren’t really supposed to drink milk beyond their babyhood. But that’s a whole other topic and not something I’m prepared to argue right now.

So I have even turned the tables on myself with this article. Becoming healthy is a never-ending battle, but it’s worth it. As we become more informed, our industry will have to start catering to our needs. We, as consumers, have a lot of power.

If you are interested in the full scientific write-up, check out this Mercola Article. And another great article from Real Food University.

Any questions, suggestions, or points I’ve missed? I’m still learning too!

Hope you’re all having wonderful Mondays! 🙂